Good news for MFi controller fans and Massdrop shoppers: the TteSports Contour is on sale for $49 right now! The sale runs out in less than 24 hours, so act fast if you want one.
If you aren’t familiar with Massdrop from the last time they dropped an MFi controller, they work a little differently from other stores. Massdrop is technically a “member’s only” site. This is a requirement placed on them by sellers – sellers don’t want people to see Massdrop’s deals without signing up first. The good news: Membership at Massdrop is absolutely free. The better news: If you like AfterPad, sign up using this link and I’ll get free stuff.
Once you sign up, all you have to do is follow this link, and you’ll be able to see $49 TteSports Contour in all its glory. Whether you want to buy one after that… well that’s up to you.
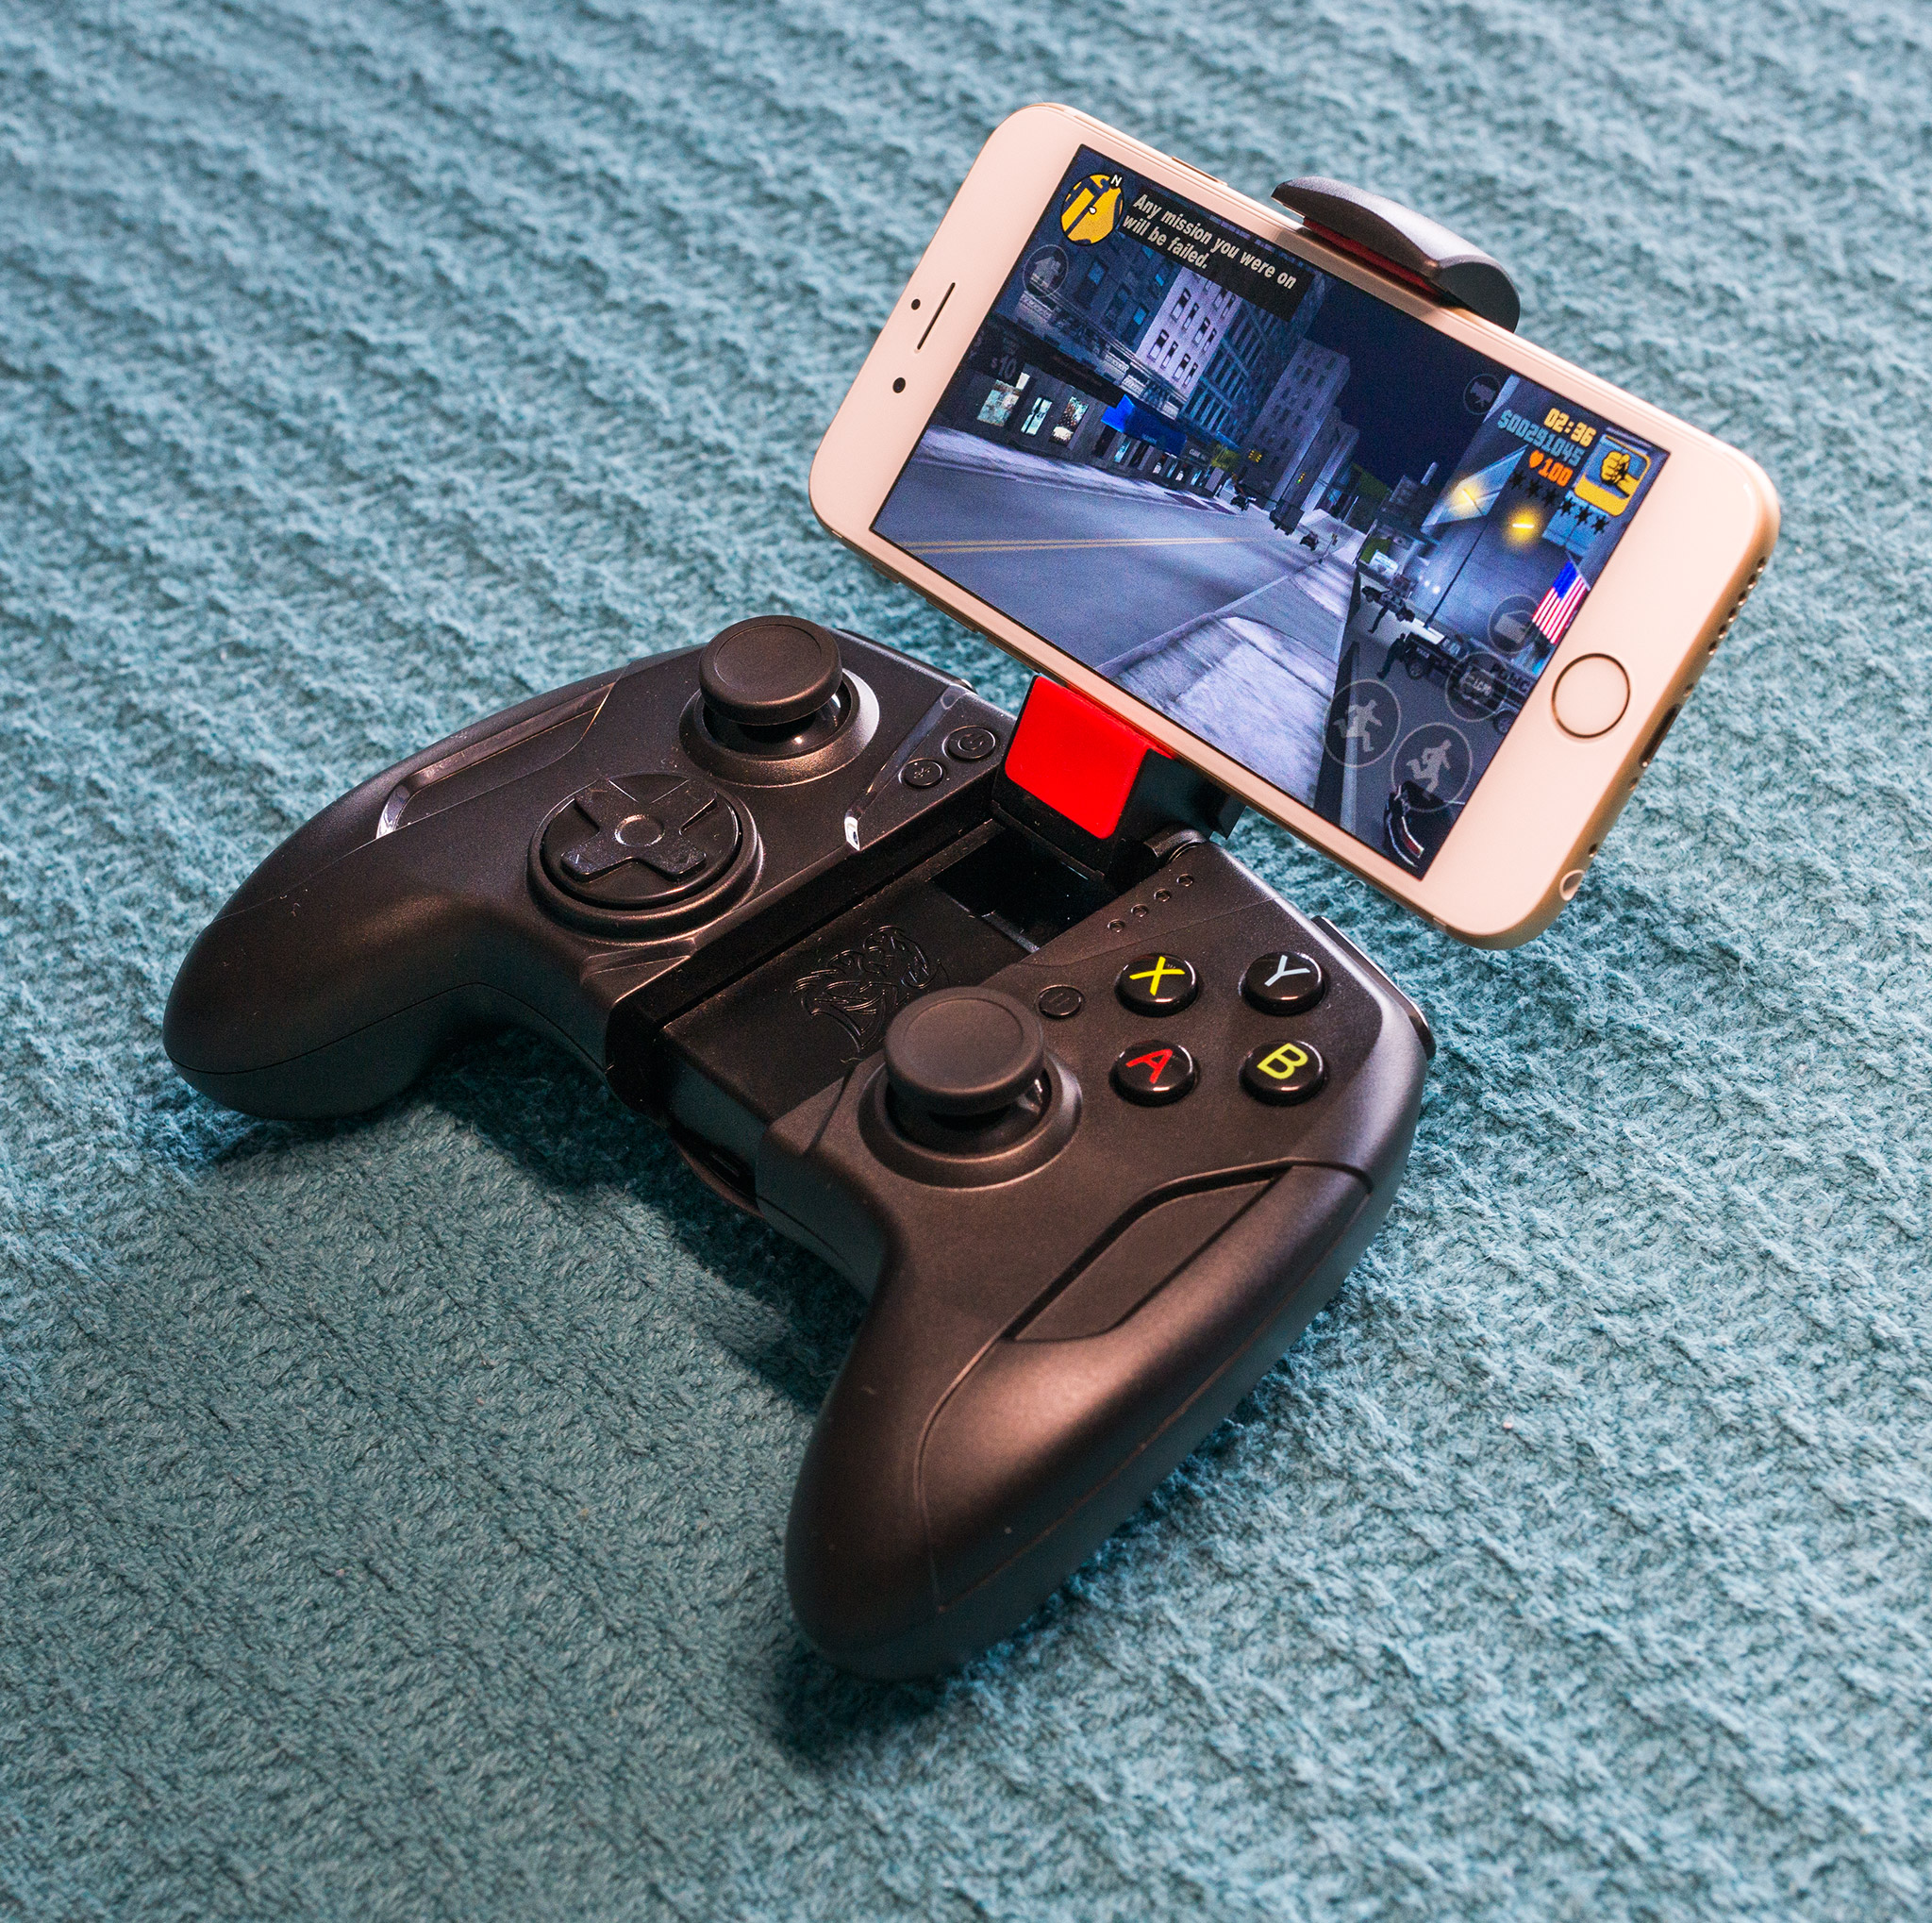
I didn’t exactly love the Contour when I reviewed it. It suffers from a relatively uncomfortable design, oversensitive triggers, and a poor d-pad. Still, it does have the best integrated iPhone grip you can get on an MFi controller – and not by a small margin, either. There are better controllers out there, but not better iPhone clips.
If the Contour is your wish list, now is the best opportunity yet to grab one for cheap. And hopefully it heralds the coming of better MFi controllers on Massdrop.
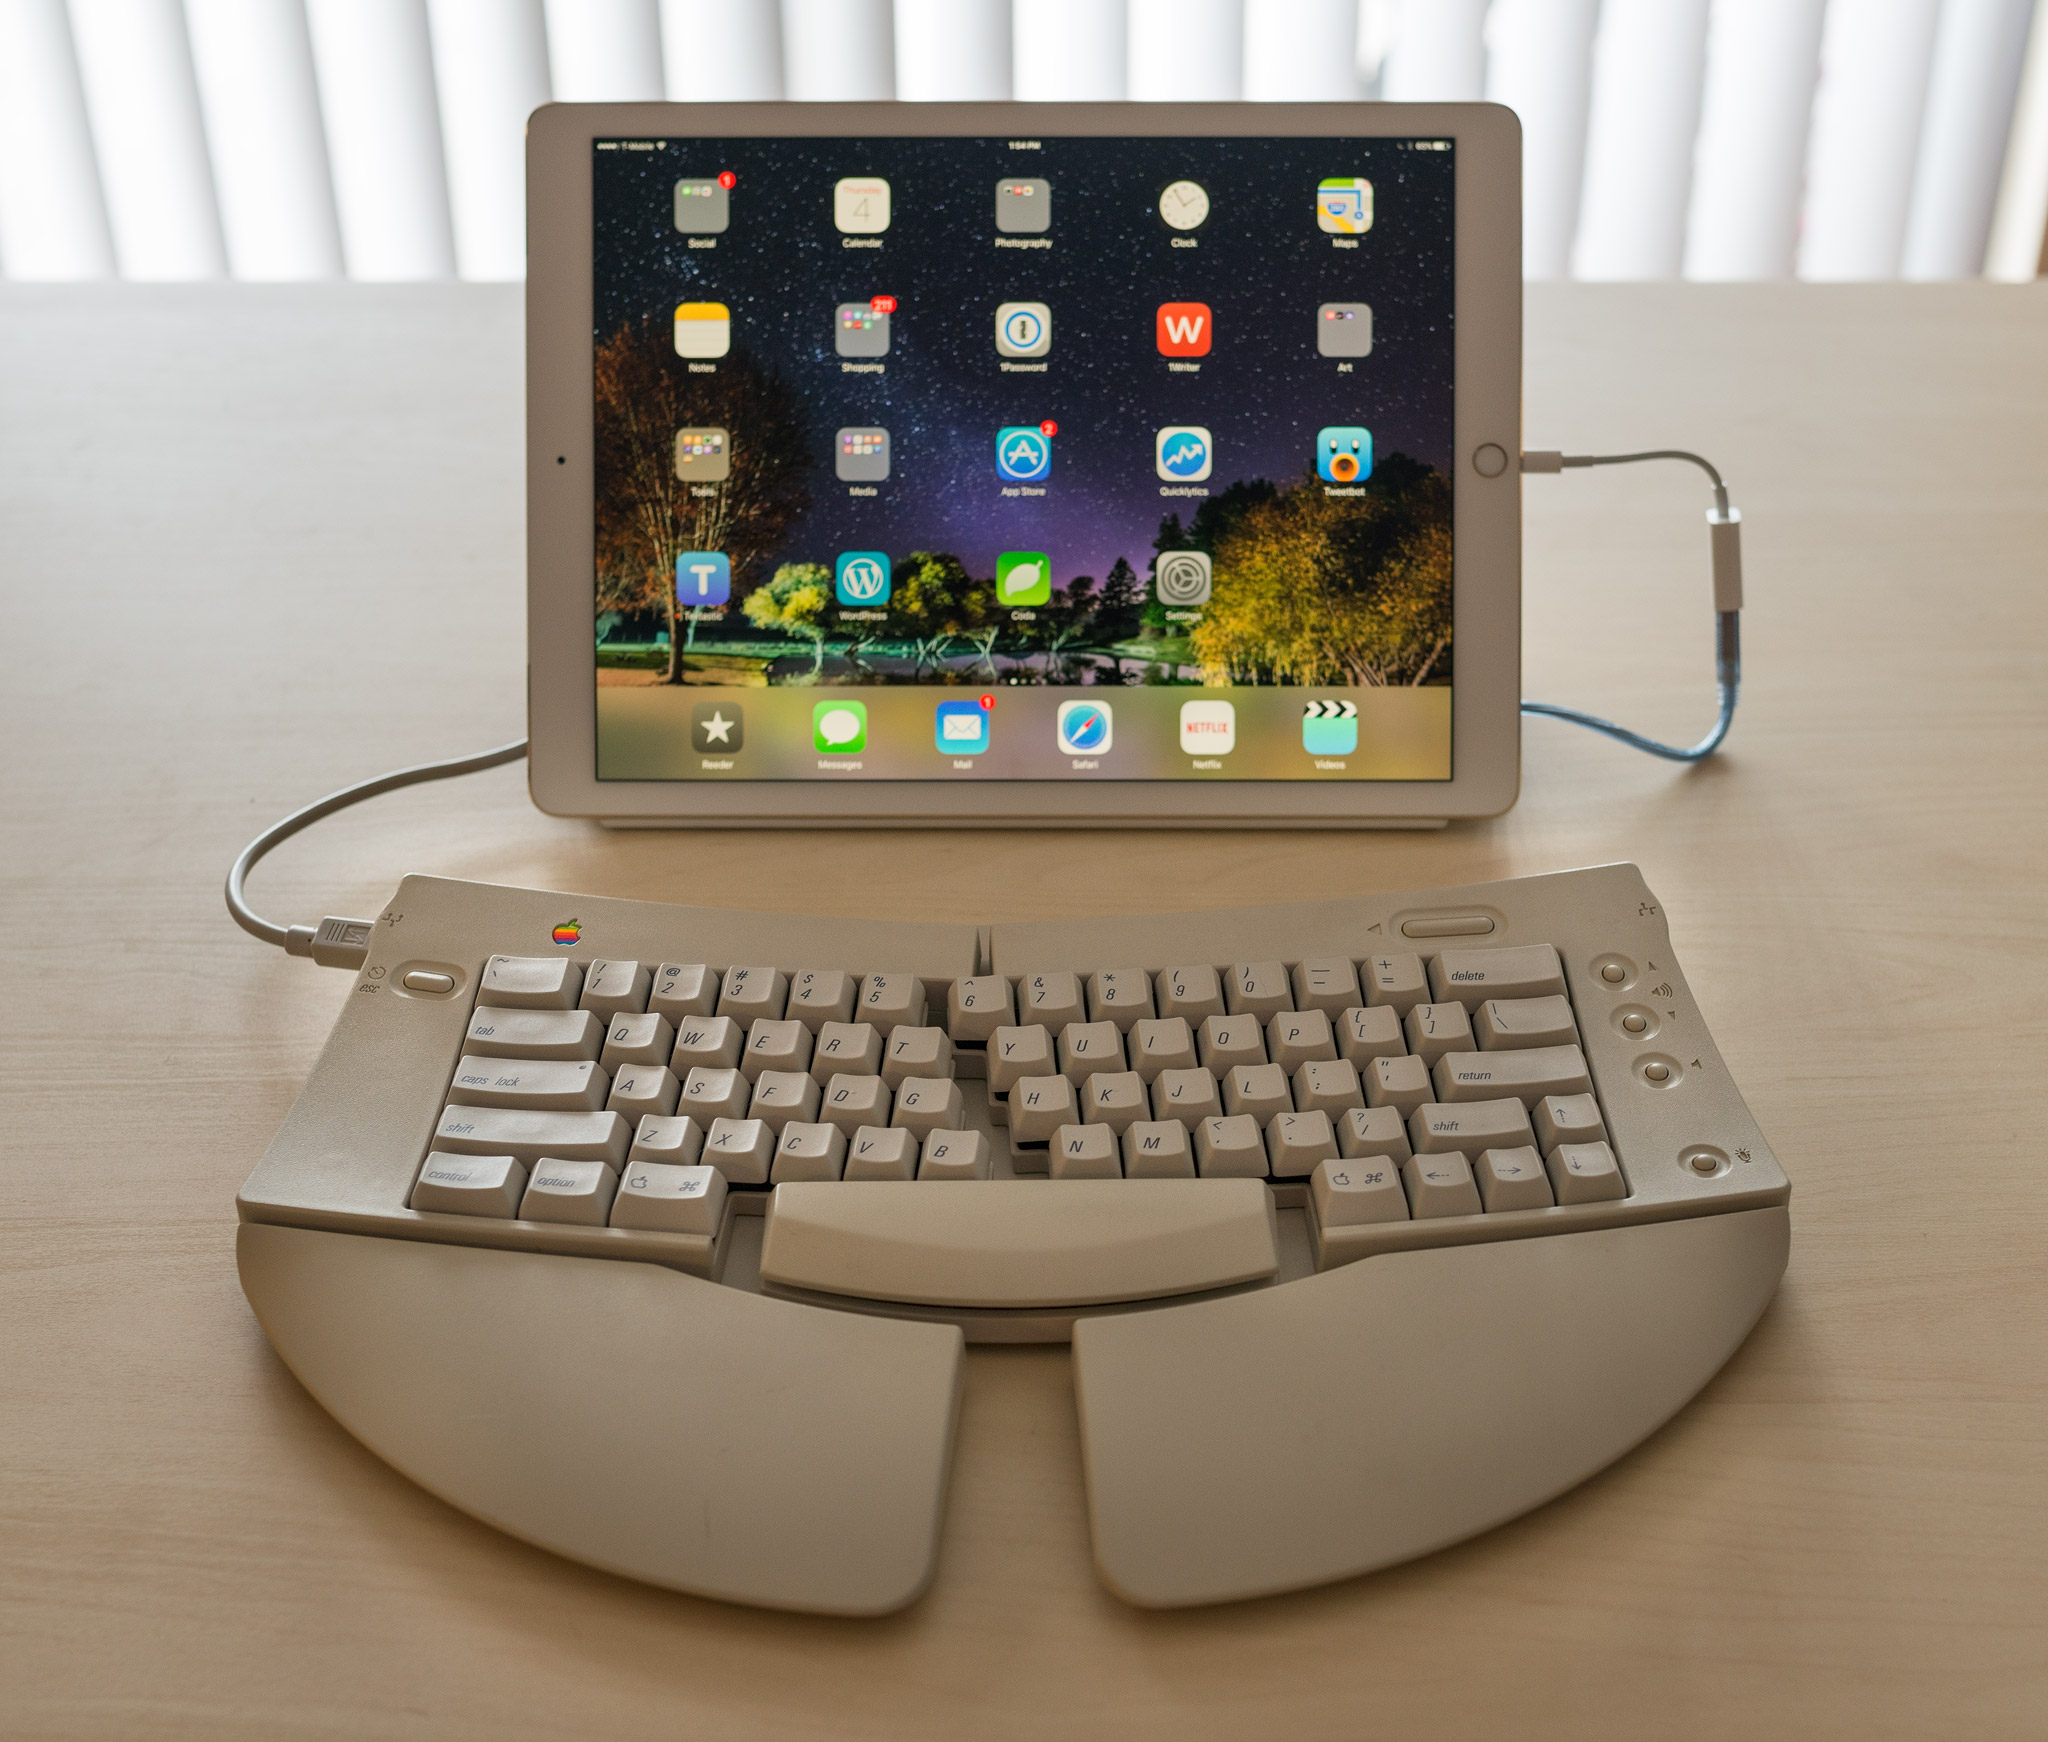
I recently tweeted a photo of my iPad connected to classic Apple keyboard. It seemed to strike a chord with a lot of people – it was my most popular tweet ever by a wide margin actually – so I figured I’d put together a guide explaining what I was doing, why you might want to do it, and how to go about it.
Why you would want to do this
There are reasons to use old keyboards with your iPad beyond appearances (and the geeky fascination of connecting 30-year-old technology to a 2016 iPad). The technology inside these keyboards – mechanical switches – can actually provide a much better typing experience than modern, non-mechanical keyboards.
Mechanical keyboards look similar to the clunky keyboards that were bundled with computers during the late ’90s through ‘2000s, but they are fundamentally different in the technology they use and the typing feel they have. To explain why, we have to talk (briefly) about keyboard technology.
Keyboard Technology
There are three major types of keyboards: scissor-style, rubber-dome, and mechanical. These types are defined by the technologies in their key switches. Key switches are the mechanics underneath the plastic keycaps. When you press your finger down in the key, switches are the things that turn that into electronic signals your computer can read.
Everyone reading this is familiar with scissor-style switches. These are the flat, thin switches you can find on every laptop. Scissor switches get their name from tiny hinges inside the switch. These hinges control the downward pressure of the key. When the key depresses all the way, it reaches a rubber dome at the bottom of the keyboard. Pressing down on this rubber dome sends a signal to the computer, which in turn turns that signal into a letter that appears on-screen.
Before scissor switches became popular, rubber-dome keyboards ruled the world. If you purchased a computer in the ‘2000s, or used one at a school or library, you know all about rubber-domes. Unlike scissor-style keyboards, rubber-domes use big, sculpted keycaps. The keycaps fit into slots on the keyboard, and inside those slots are springs. Press down all the way and you reach a rubber dome, the same as on a scissor-style keyboard. Bottom-out this dome, and the computer reads the signal.
Although scissor switches and rubber domes look different, they’re actually quite similar. Both use a rubber membrane at the bottom of the keyboard to read inputs. Because of this, both require you to fully depress the keys, bottoming-out against the base of the keyboard. Because both require rubber domes, both are dependent on the quality of those rubber domes. And because these keyboards are manufactured cheaply, the feel of the switch often suffers.
Enter Mechanical Keyboards
Mechanical keyboards look superficially similar to rubber-dome keyboards – they share the same large sculpted keycaps, and generally have full layouts with F-keys and number pads. Functionally, they are completely different.
Mechanical keyswitches come in many varieties, but generally speaking, they share a similar design. The keycap rests on a stem attached to the key switch. This stem rests on a spring. When you depress the key, it presses the stem down into the switch. When the stem is pressed about halfway down, it activates a tactile leaf. This triggers an electronic signal on the side of the switch, which is sent to the computer. Pressing this tactile leaf can also cause your finger to feel a bump or trigger a louder clicking noise, depending on switch type.
Importantly, because the switch activates about halfway from the bottom of the key’s range, you don’t actually have to press down on the key all the way. There’s no rubber dome at the bottom – as soon as you’ve triggered the switch, you can let go of the key. Some people think bottoming-out keys might be bad for your fingers; the jury is still out on whether any actual damage. One thing is certain: many people – myself included – think that bottoming-out keys feels much worse than activating mechanical keyswitches. And when you’re sitting down to write thousands of words at a time, feeling good helps.
Finding a Good Mechanical Keyboard
Let’s get the obvious stuff out of the way: the best way to connect a mechanical keyboard to your iPad is to simply get one that already features a Bluetooth connection. The Matias Laptop Pro is my favorite, but there are a few other choices – I’m keeping a list on Amazon of everything I can find.
Modern USB mechanical keyboards can work with the iPad, but these often use more power than the iPad is capable of supplying, requiring an additional power source – more on that later. With enough work, you can use any mechanical keyboard with the iPad. This article assumes you want to make a retro keyboard work.
Finding Old Keyboards
Mechanical keyboards were commonplace when computers were expensive. The added cost of mechanical switches was largely offset by the cost of the computer it was bundled with. As computers plummeted in cost during the ’90s, most manufacturers switched to bundling cheap rubber-dome keyboards. People upgrading their PCs tended to get rid of their old keyboards and use whatever the new computer came with – great news for us, because it means we won’t have to try too hard to find a great mechanical keyboard.
If you check your local thrift shops, electronics surplus stores, and garage sales, you can probably find a usable mechanical keyboard for about 5 bucks. If you take to eBay, you won’t need to spend more than $40 (including shipping) for a top-quality keyboard. In fact, you (or your parents, or your uncle, or your grandparents) might already have one of these keyboards in your basement somewhere (I found a mint condition Apple Extended Keyboard II I stashed away in a drawer when I got a Bondi iMac).
There are way too many different mechanical keyboards out there for me to cover in this article – get lost in Deskthority Wiki sometime if you want to go down that rabbit hole – but I will recommend a few common ones to keep your eyes out for. The Dell AT101 line is a decent quality, common choice; they made a ton of these, and you’ll probably be able to find one without too much effort. I spent $5 for one at an electronics surplus store, and they don’t go for much more on eBay. The Apple Extended Keyboard II is very highly regarded, and can usually be had for around $40 on eBay. Of note, Apple’s keyboard has PBT keycaps, which are thicker and higher quality than many keyboards, which use ABS plastic. IBM’s classic keyboards can generally be found for $40 or so on eBay, and use well-regarded spring switches. Keep in mind, not every keyboard from these manufacturers uses mechanical switches – check online, especially at the Deskthority Wiki, before buying.
Connecting a Mechanical Keyboard to your iPad
Now we get to the fun part. You found a mechanical keyboard, and you want to use it with your iPad.
The good thing is, once you connect your keyboard to the iPad, iOS is fully capable of using it – the keys all work, you don’t need to install any drivers, jailbreak anything, or take any special steps. The tricky part is actually connecting these keyboards to your iPad.
The first step: determine what type of connection your keyboard requires.
This is the obvious starting place: what port is your keyboard designed to connect to? Vintage Apple keyboards used something called an ADB (Apple Desktop Bus) port. (Relatively) newer PC keyboards use something called a PS/2 connector. Really old PC keyboards use a larger 5-pin DIN connector, sometimes referred to as the PC/AT interface.
Obviously none of these will connect to your iPad, so you’ll need to convert them to something the iPad can understand. There aren’t any cables that directly convert these ports to Lightning, so you’ll first need to convert to USB. You can then use Apple’s Lightning to USB Camera Adapter to convert the USB connection to Lightning.
Connecting Mac Keyboards
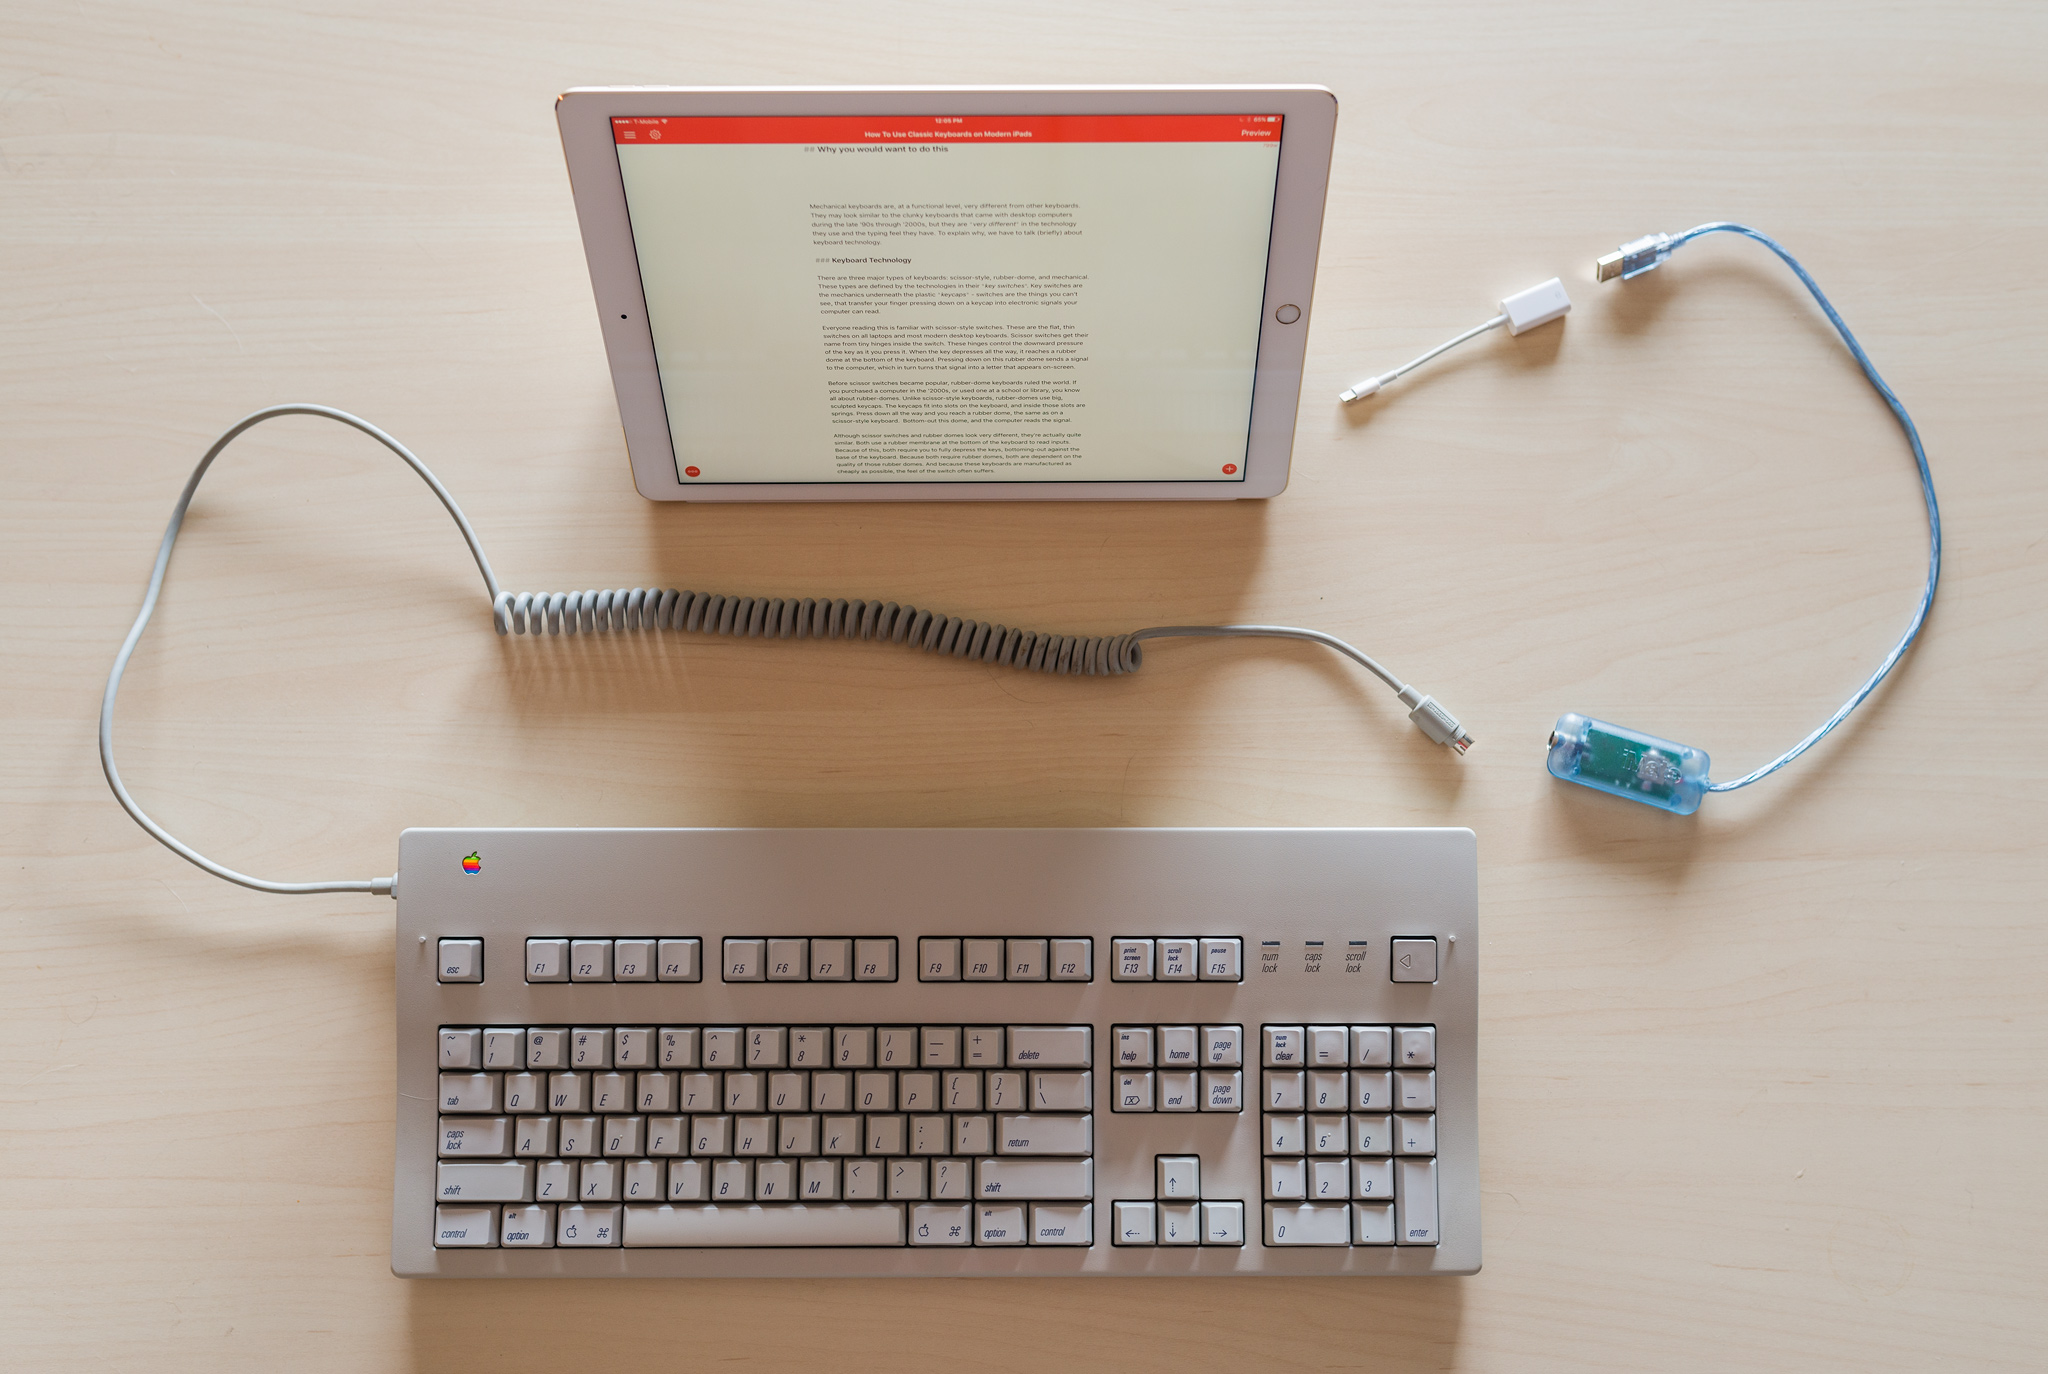
The easiest keyboards to convert are ones designed for Mac, which use ADB ports. If you have an ADB keyboard, converting it to USB requires the Griffin iMate. You can get a new one for $69 on Amazon, but you can probably get one for $30 if you search eBay instead.
The best part: once you connect the iMate to the iPad via the Lightning to USB cable, everything works perfectly. No configuration, no drivers, no worries.
Connecting PC keyboards
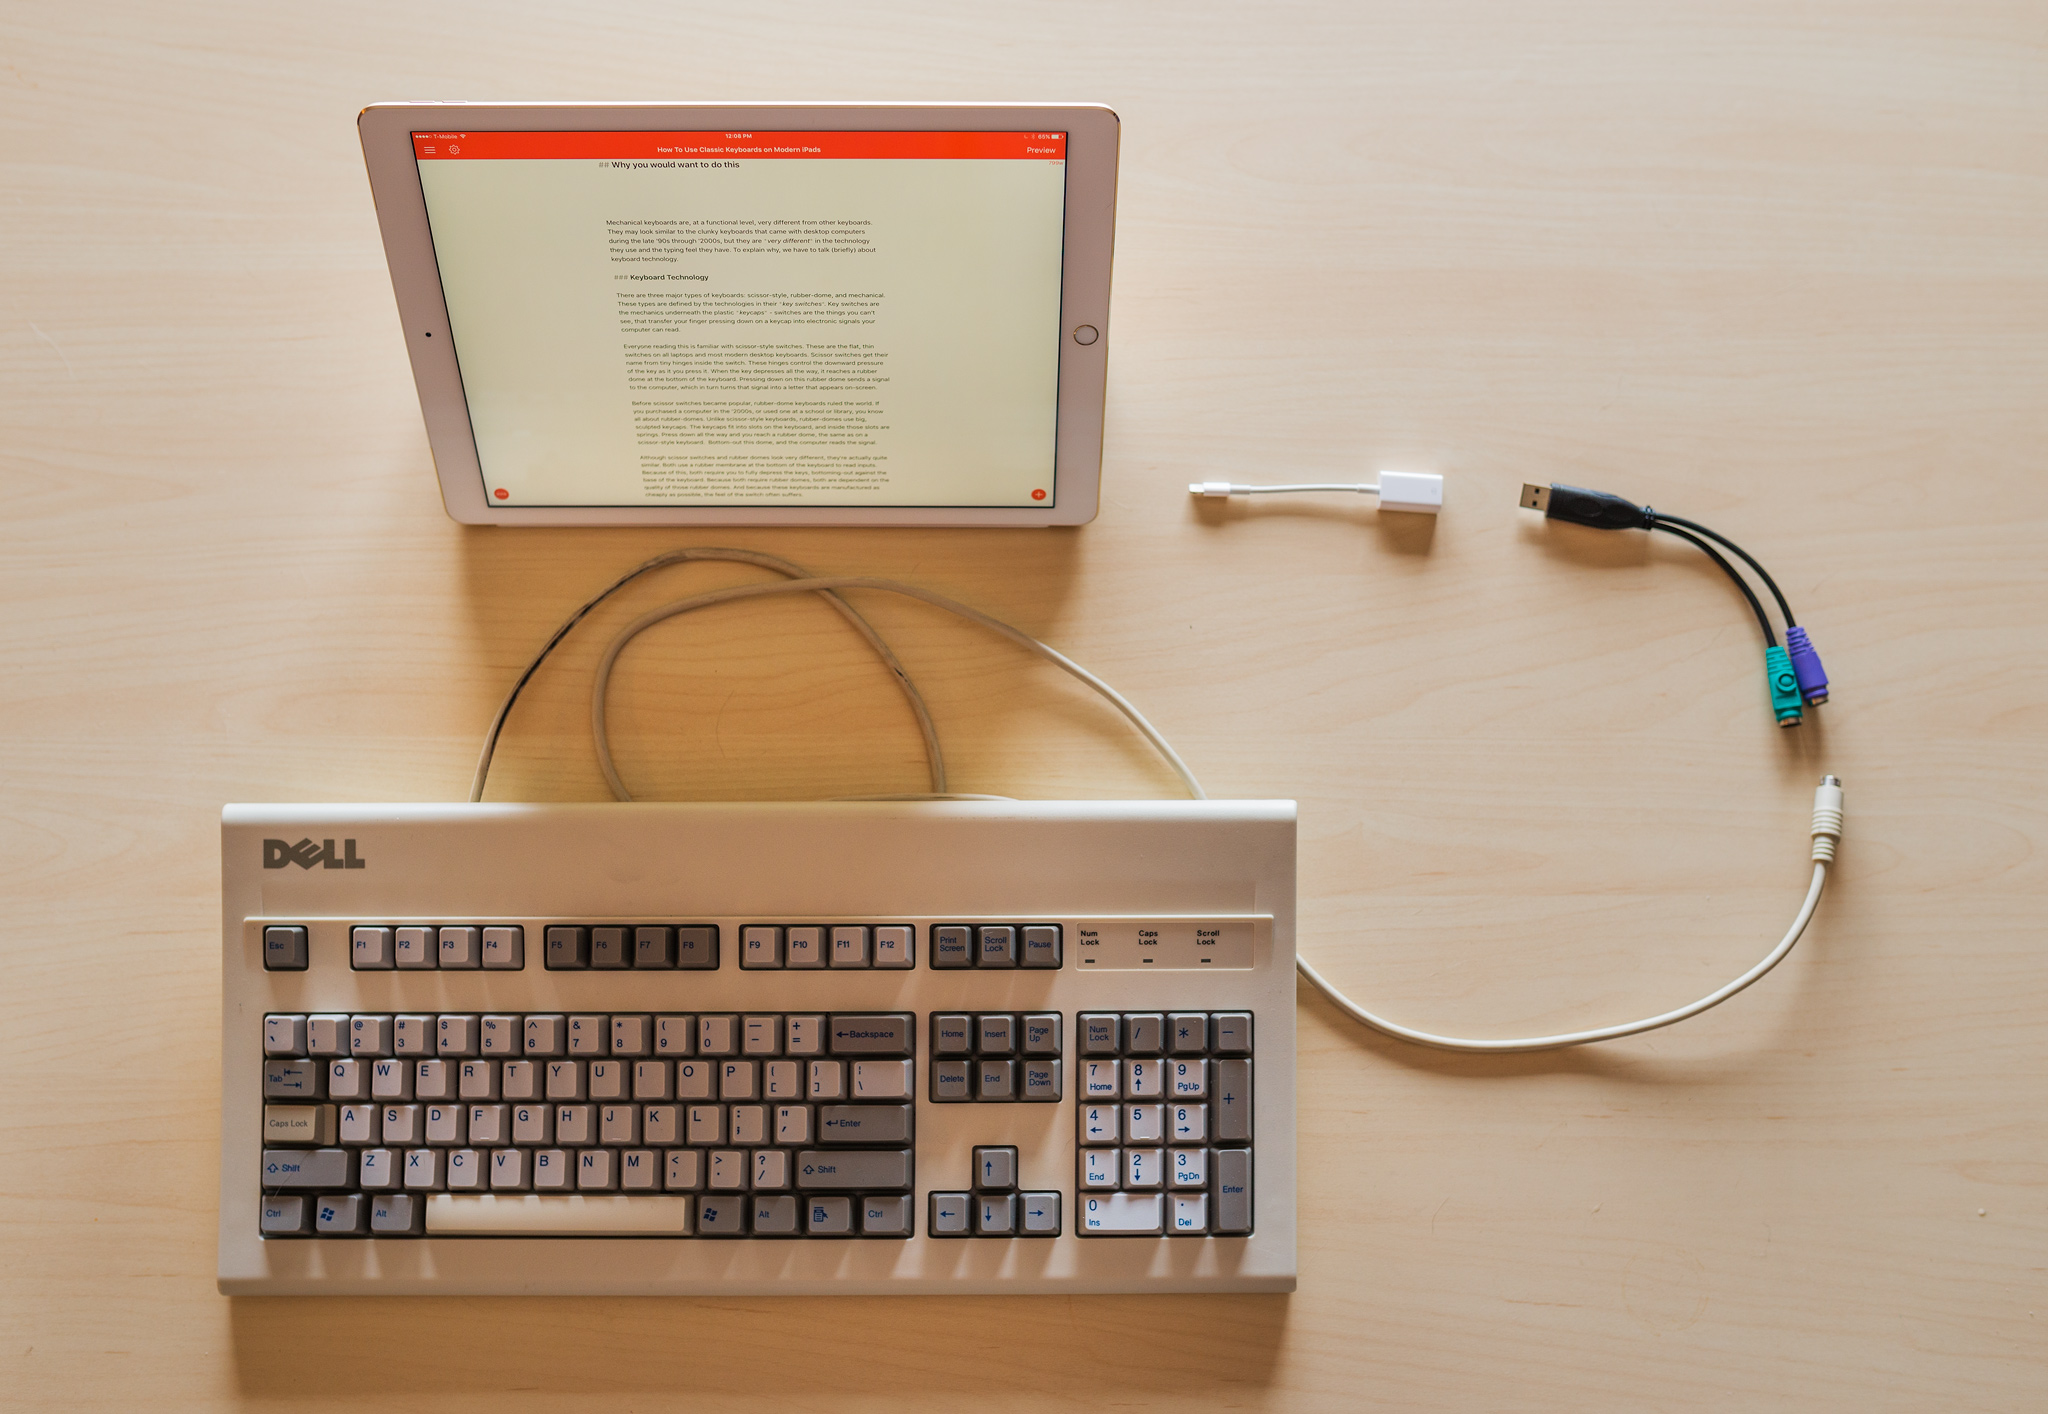
PC keyboards sometimes require a bit more work. First off, you’ll need to convert your PC keyboard’s connection to USB. If your keyboard originally came with a PS/2 to to USB adapter, it already has the circuitry required, and a passive PS/2-to-USB connector is all it takes. This is rare. More likely, you’ll need an active PS/2 to USB adapter, which contains additional circuitry.
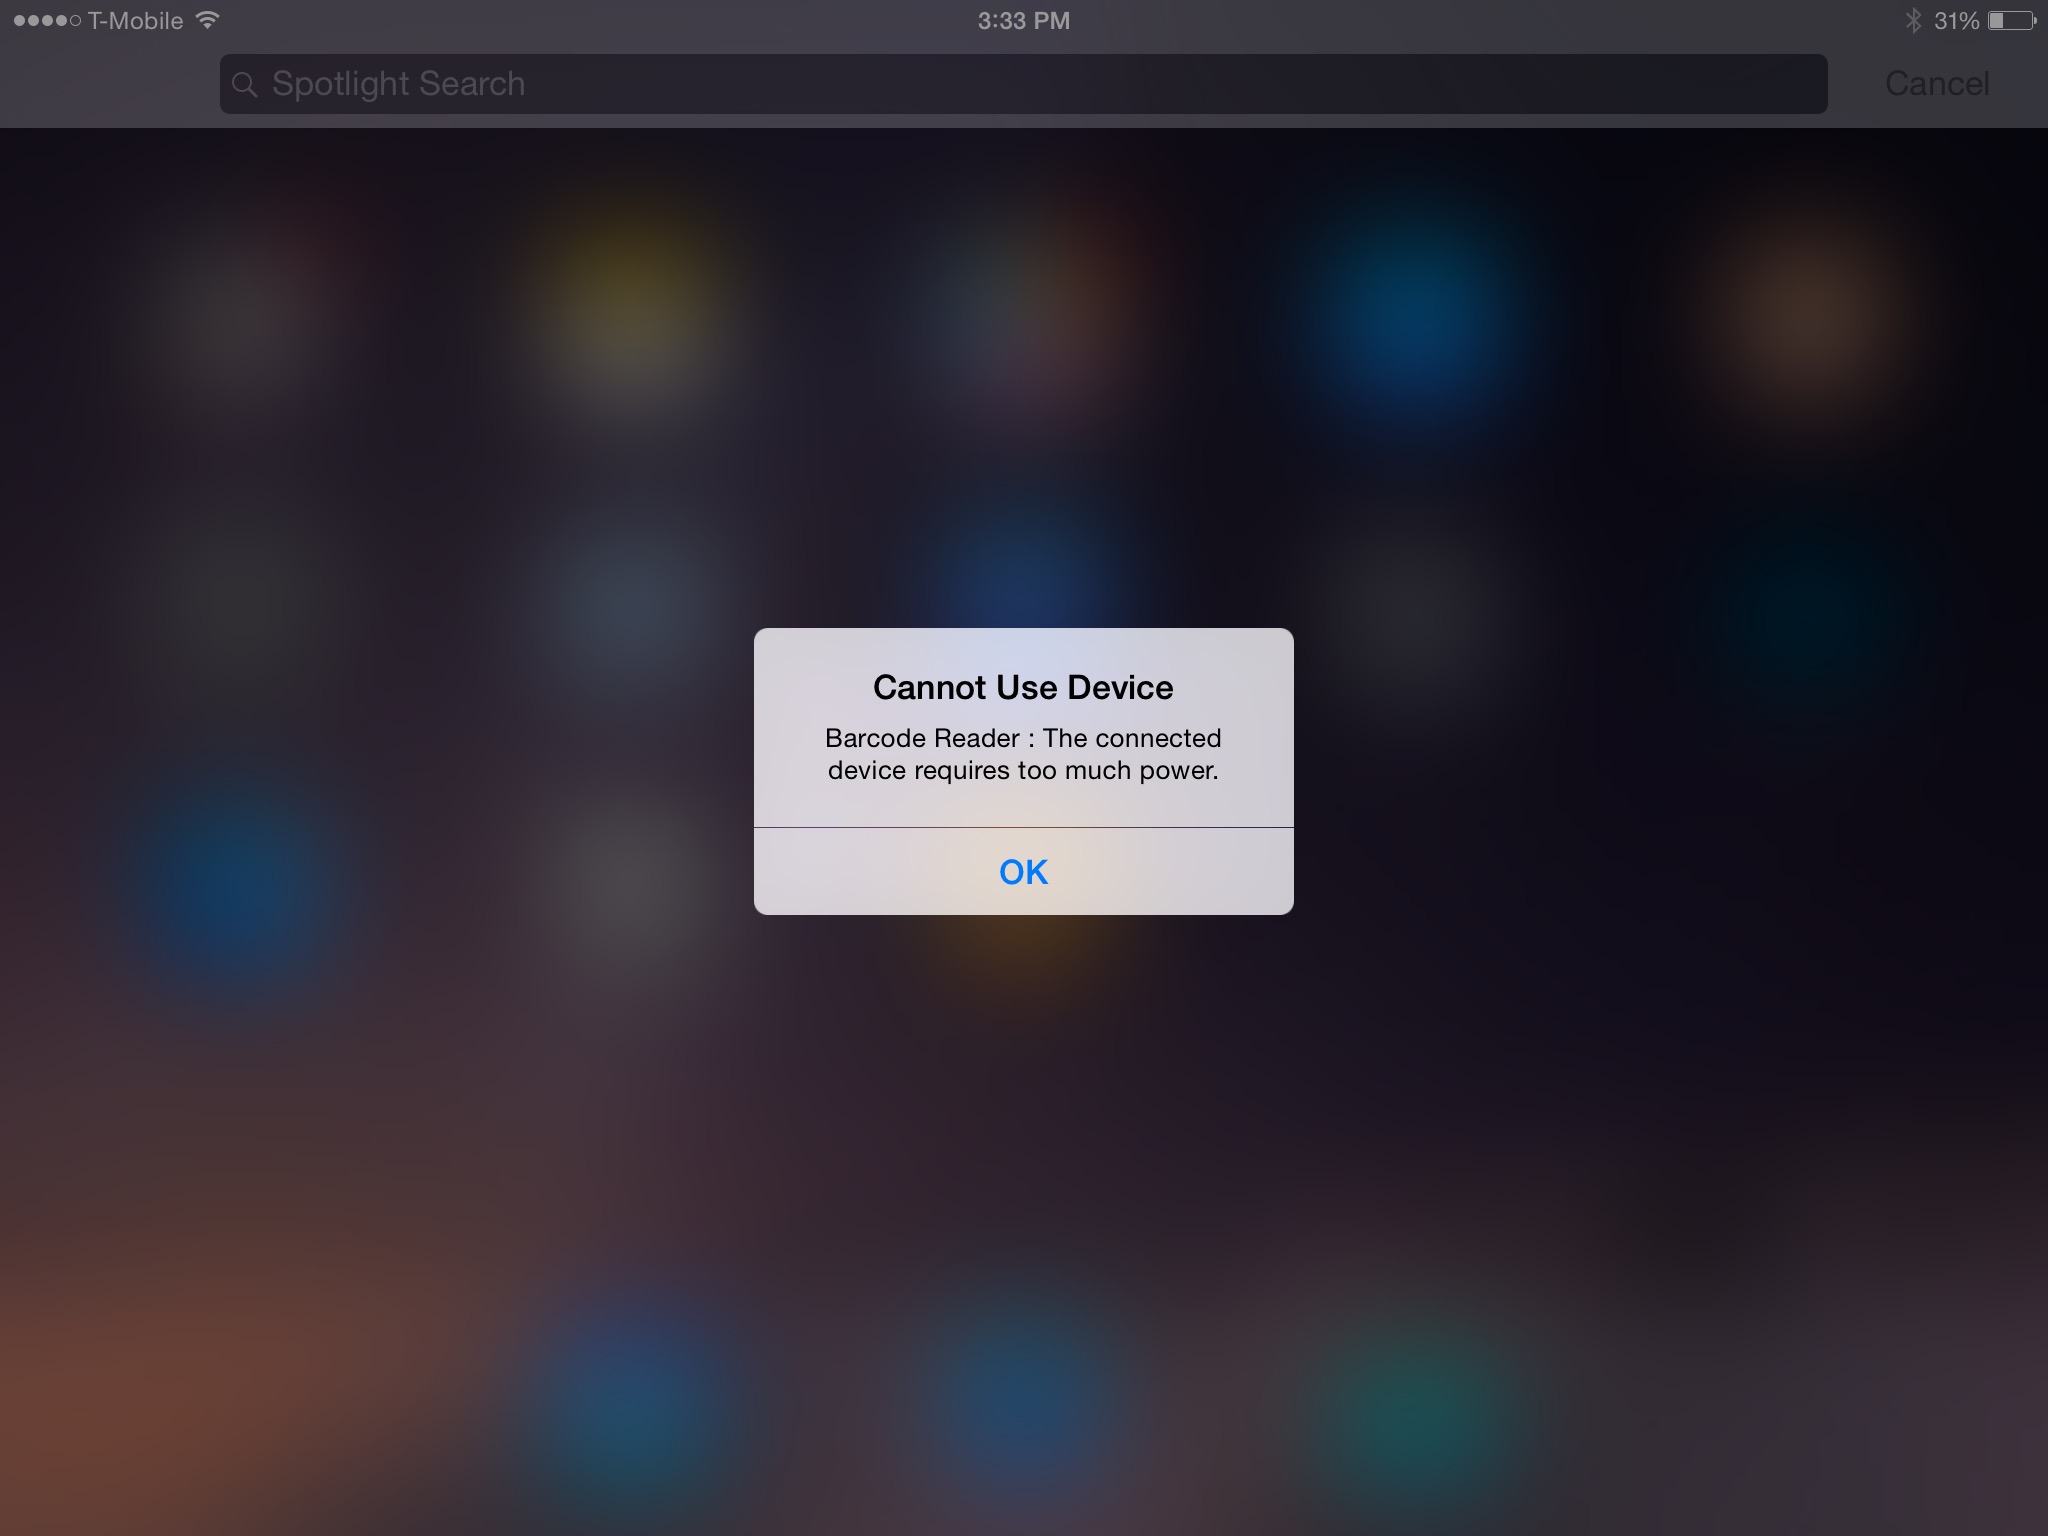
Active adapters draw power from USB in order to charge the circuitry required to make them function. Unfortunately, if they draw too much power, the iPad will throw up an error and refuse to work with the adapter.
Dealing with Errors
If you’re lucky, all you’ll need to do to connect a mechanical keyboard to your iPad is connect the correct legacy-to-USB adapter to the Lightning port, plug it in, and start typing.
Unfortunately, it might not be that simple. While I haven’t experienced any issues with connecting ADB keyboards to the iMate, I have experienced problems getting PS/2 keyboards to work.
The problem is due to Apple’s policies with the Lightning to USB Camera adapter. Apple has strict limits on the amount of power this adapter supplies to connected devices. If these devices require more power than the iPad outputs, the iPad might cut them off. Thankfully, there are workarounds to this problem.
The easiest solution: use a PS/2 to USB adapter that doesn’t draw too much power. Unfortunately, the only one I have does require more power than the iPad will output. I’m in the process of testing others for PC keyboards, and will update this article when I find a winner. Again, for Apple keyboards, the iMate should work perfectly without drawing too much power.
Even if your adapter does draw too much power, all is not lost. First, make sure your keyboard is actually not working – sometimes it’ll work with the iPad even after throwing up an error message. If it really doesn’t work, you’ll need to add a power supply to your adapter chain.
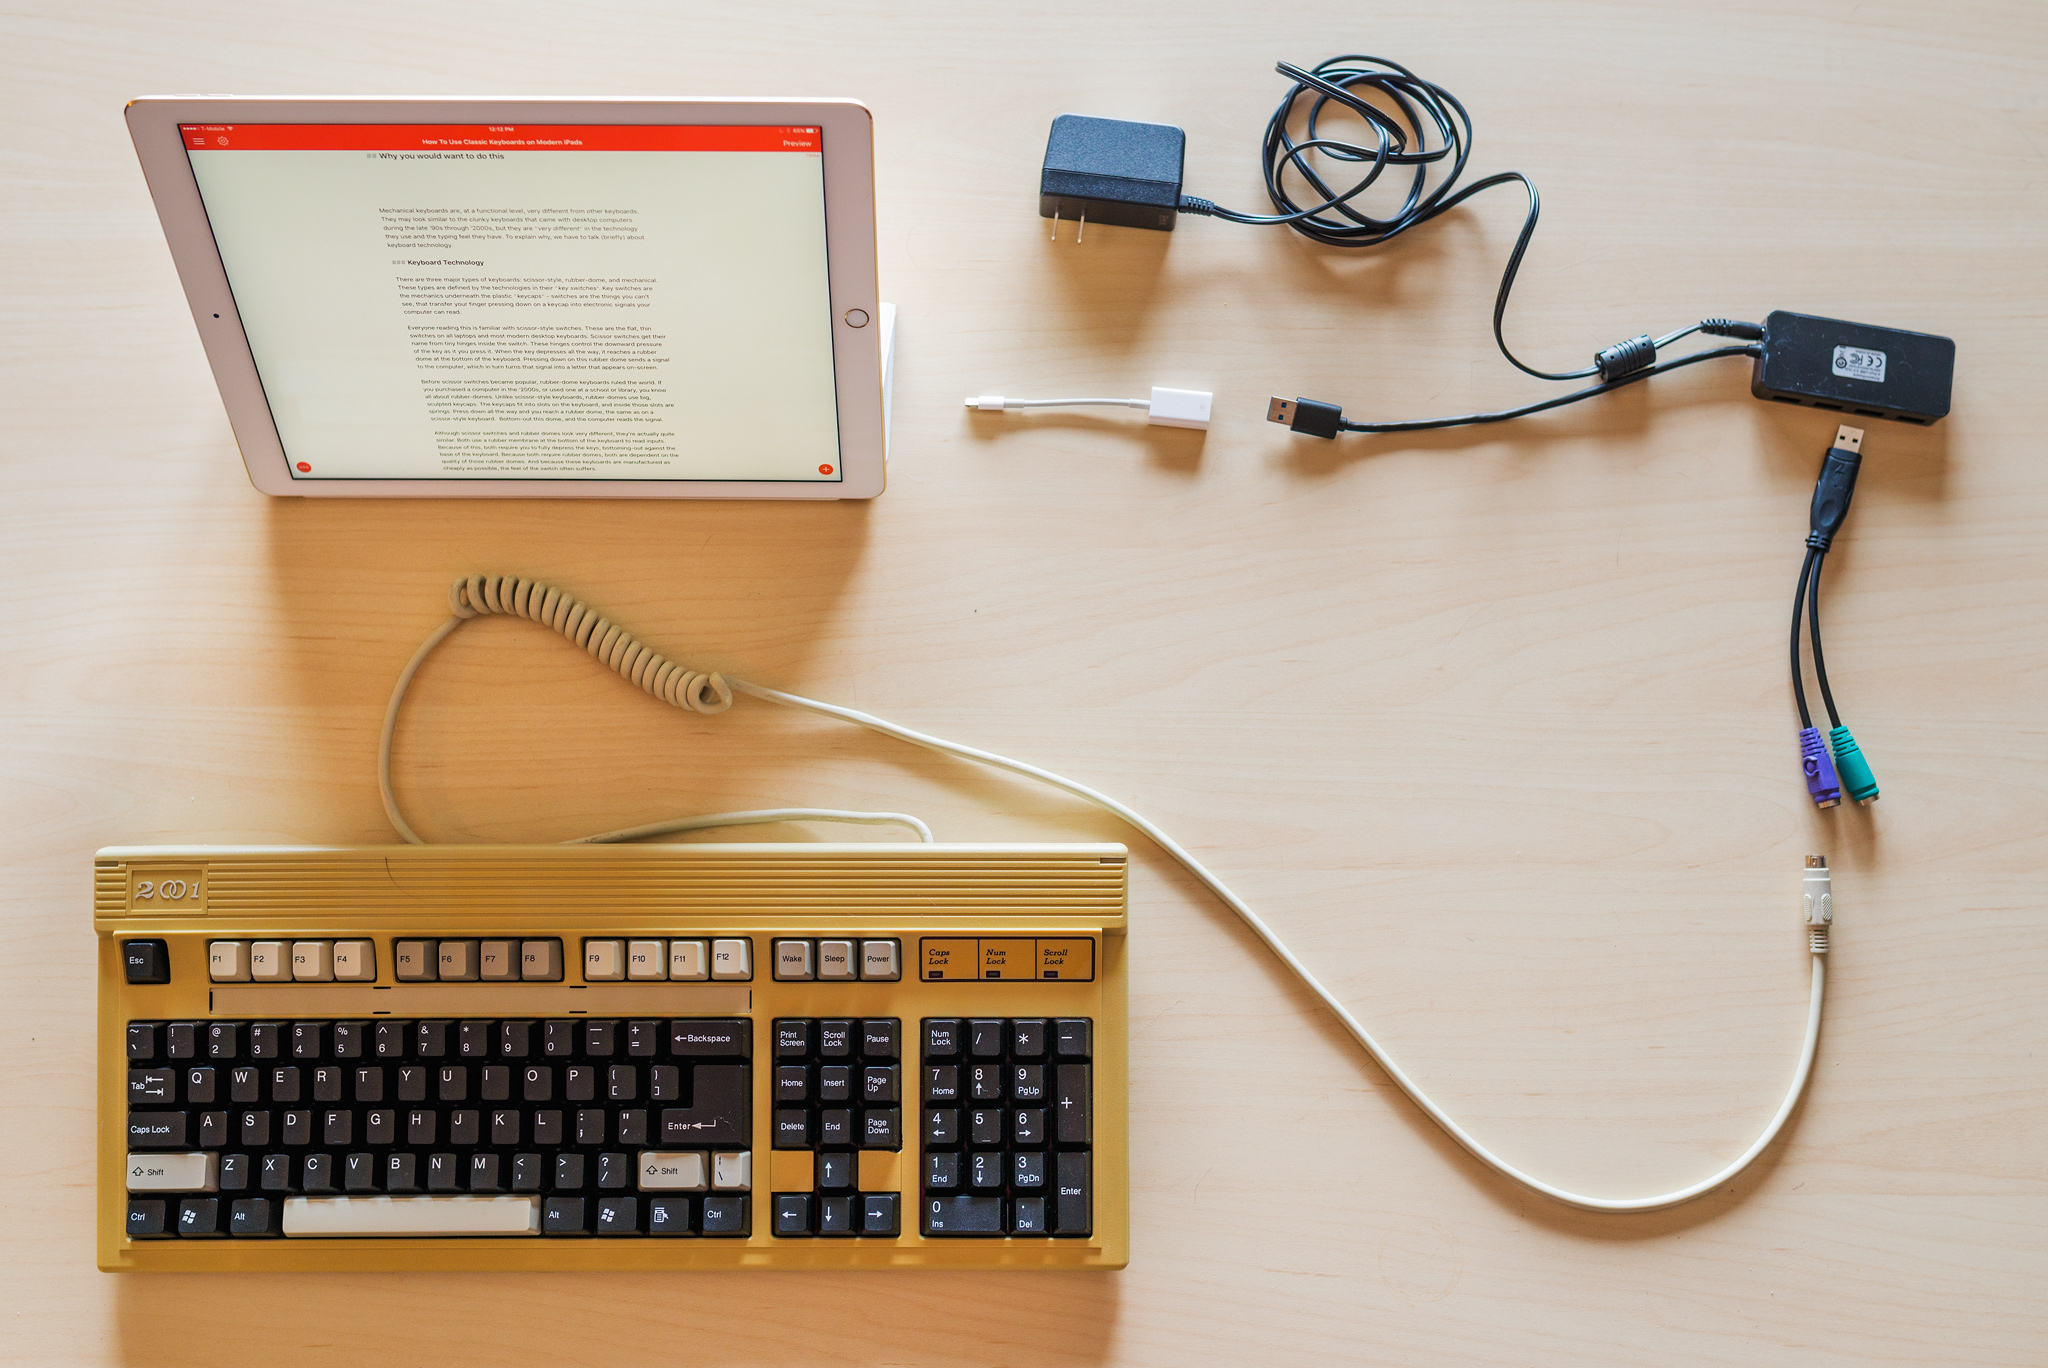
The easiest way you to supply additional power to your adapter is with a powered USB hub. Attach your keyboard to the hub, plug the hub into a wall socket, attach the hub to the Lightning to USB Camera Adapter, then attach that to the iPad. This powers the keyboard without drawing power from the iPad, bypassing any power limitations. Any powered USB hub should work, but I can vouch for the Amazon Basics USB 3.0 hub.
Final Thoughts
My goal with this guide is to describe why you might want a mechanical keyboard and how to use one with your iPad. This is by no means a complete guide to mechanical keyboards. Not even close. There are tens of thousands of different kinds of mechanical keyboards out there.
There are online communities where keyboard enthusiasts discuss this stuff in far more detail than I have here. If you find this type of thing interesting, you should definitely check out the Mechanical Keyboards subreddit, the Geekhack forum, and the Deskthority Forum and Wiki.
Still, I’d be happy to answer any questions you might have. Drop by the forums to chat if you’d like, or get in touch on Twitter; I’ll be happy to help if I can.
Shaun Musgrave explores what makes Mega Man such a classic game, and lays out some of the criteria by which Mega Man clones should be judged.
Future articles will discuss how specific clones, such as AfterPad Game of the Month runner-up Venture Kid, measure up to the real deal.
I’m in the process of playing through the Mega Man series for the first time, after finishing Venture Kid last week; I’ll definitely have some thoughts of my own to share, once I make a little more progress through the series. So far, while I can see how Venture Kid has some baffling flaws in its presentation, I just don’t feel the hate some people have been giving it.
On another note, Shaun has been on a role lately over at his site, Post Game Content. If you only know him from TouchArcade, you should subscribe. Lots of great content there about classic console games. If you’re a fan of the RPG Reload series on TouchArcade, there’s a lot here you’re going to love.


